When you have to design a website, you should pick 2 basic colors. In this website green and black are the colors. From these colors you can get others. You should make a sketch of the site before you start the work.
Step 1
Open new document 500x550 pixels. Fill it up with black. Go to Layer > Layer Style > Stroke. Here set the size: 7 and color (#969696). Now we will place all the content in boxes.
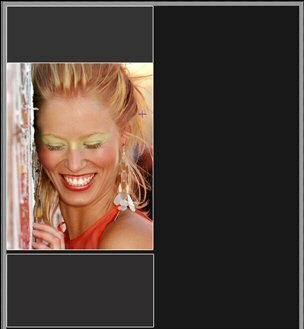
Now we have the black background. We imaginary divide it into 2 columns. First column will have 3 boxes. We start with the one in middle. I will use this picture.

Open the image. Go to Layer > Layer Style > Stroke. Size: 1, Color: white. After the picture is ready drag it into the document and place it almost in the middle of the first column.

Step 2
So we can finish the first column we have to add two more rectangular. Open a new layer. With your Rectangular Marquee Tool draw a rectangular above the woman. Fill it up with #343434 and add some layer style (stroke); ca size: 1, color: white. Now add another one at the bottom and don`t forget the stroke.

Step 3
The right column is ready. Now the left one. Open a new layer. Draw a rectangular in the up-right corner. Here we will add the title and logo. Fill the rectangular with #343434, add the stroke like before.

Open a new document 46x10 pixels. To add some style to the box, we will work with some gradient, but we will make a little special. Fill the new document with (#55671d).Now drag it into the first document in the last layer. Do the same thing but with this color. We will go from dark to light. (#59720a) / (#5e780a) / (#759212) / (#7aa00f). Now you have a lot of new layers. Ctrl+Right Click and Merge Layers. You only do this with the layers that contain the green rectangular. Now duplicate the layer and move it at the bottom.

Step 4
Now open a new layer and with your Rectangular Marquee Tool draw a rectangular with the same width like the one above, but the height about half. Fill it with the same color and apply the stroke. Now add a little green rectangular on the right.

Duplicate the layer 2 times and place it under the first. This is the left column. Add some products in the boxes.

Step 5
Put the two columns together, add some text and this is the result. You can place the boxes how you like.

Filed under Photoshop Tutorials

