Step 1
Save the next pictures on your computer (initial.jpg, initial-blur.jpg), you need them to complete this tutorial.

Step 2
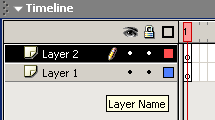
Create a new layer in Timeline. Now we have two layers: layer1 and layer2:
Step 3
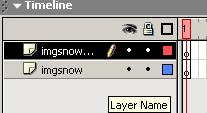
Rename that layers like: layer1 “imgsnow” and layer2 “imgsnowblur”:
Step 4
In the first frame of “imgsnow” layer import (File > Import ) the “initial.jpg” image. Repeat the step for the “imgsnowblur” layer this time with the “initial-blur.jpg” image.
Step 5
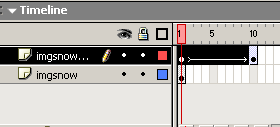
Insert a new frame in Timeline at position 10 like this:

Step 6
Right click on the new frame and select Motion Tween to create a motion tween layer:

Step 7
On the final frame of the “imgsnowblur” layer right click and Insert Keyframe
Step 8
In Timeline choose the first keyframe of the “imgsnowblur” layer and, in main stage, move the “initial-blur.jpg” at next position: X=169.5, Y=10.9:

Step 9
In Timeline select the last keyframe of the “imgsnowblur” layer and, in main stage, move the “initial-blur.jpg” at next position: X=-36.5, Y=66.4.
Step 10
In the Properties Tab make Alfa Opacity = 0%.
Step 11
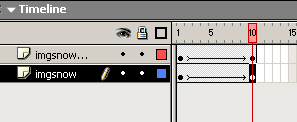
Return now on the “imgsnow” layer to create animation there. Insert a new frame at posision 10 in Timeline, right click on this and Create Tween Motion. New keyframe on the last frame in Timeline. The result:
Step 12
In Timeline select the first keyframe of the “imgsnow” layer and, in main stage, move the “initial.jpg” at next position: X=148.3, Y= -17.8.
On the last one X=-74.4, Y= 76.8.
Step 13
CTRL+ENTER to play your movie.
Filed under Flash Tutorials

