Step 1
Create a new document in Adobe Photoshop with the size 400x400 pixels and a white background. Type a text with a red color. I used the text “web” for this tutorial:

Step 2
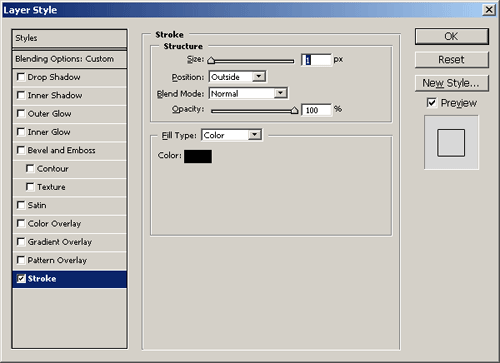
Duplicate the layer with the text. To do this, right click in the Layers Tab (on the layer which want to duplicate) and choose Duplicate Layer. Set the “Fill” to 0% and add stroke to the new layer; use the next settings for the stroke effect:

And the result:

Step 3
Duplicate the layer “web”. Set the color on the layer “web” to black and move it in the new position like in the next picture:

Step 4
Duplicate the layer and move it; and move it again like this:

Step 5
Duplicate the layer again and add some perspective, change the opacity (to create a drop shadow effect) and you have a nice 3d text:

Step 6
You can now add a texture on your text or other effect:

Filed under Photoshop Tutorials, Text Effects Tutorials

