Step 1
Open Adobe Photoshop and create a new document with a white background color. Draw a sphere in you document, using the “Ellipse Tool” (find this tool in the Tools Tab). To make the sphere symmetric hold down the SHIFT key when you are drawing the sphere:

Step 2
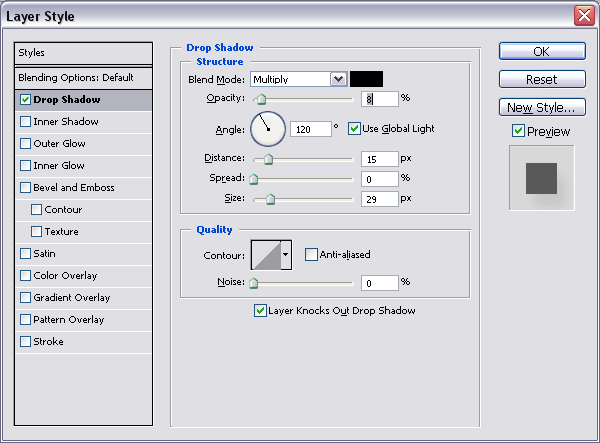
Select Layer > Layer Style > Drop Shadow to add shadow to your layer. Apply the next settings for this effect:

Step 3
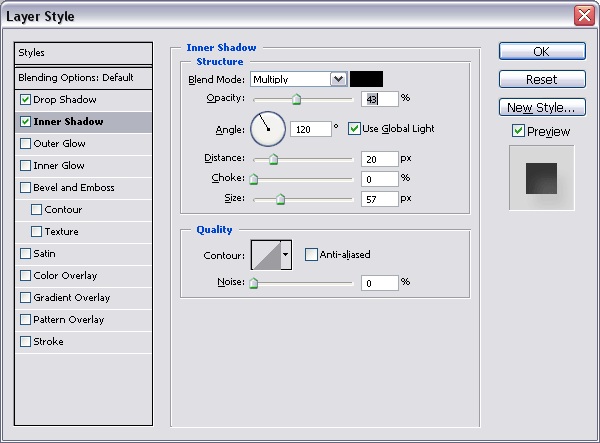
Apply the “Inner Shadow” effect. To do this, select Layer > Layer Style > Inner Shadow with the next settings:

After these two steps the result should be something like this:

Step 4
Create a new sphere with a white color and “resterize” the layer which contains this sphere:

Step 5
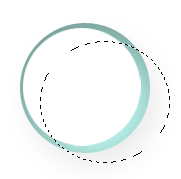
Make a selection on this sphere like this:

Delete the selected area and set the opacity for this layer to 25%:

Step 6
Duplicate the layer, resize it and rotate it, move it like below (to make these actions check the Edit options menu):

Step 7
Duplicate the layer “Shape 1” and set the “Blending Mode”, in the Layers Tab, to “Pin Light”:

Step 8
Duplicate it again and set the “Blending Mode” to “Multiply”. Make this step again and this is the result:

Step 9
You can now play with the details and obtain a nice translucent ball:

Filed under Photoshop Tutorials

